
January 15, 2008
Pastor's Inlet Mixes My Hobby & Life
The Pastor’s Inlet Portage and Navigation Company will be an N Scale kitbash of Dave Frary’s Thatcher’s Inlet originally published back in 1972.
I turned 69 this month and am much more interested in following the life my Pastor leads. This is not so much a tribute to Him as it is a reminder to myself not to get too wrapped up in things that don’t matter.
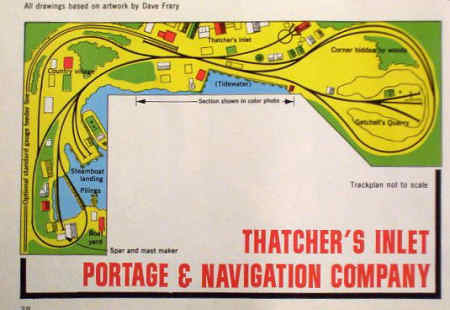
Frary’s 30-year-old plan was originally conceived as an H0n30 narrow gauge operation so the fit should be pretty good.
I like Frary’s use of a lot of buildings in a small space and this opens the door to using some of my newly developed paper structures as both background and foreground structures.
I am convinced this is the way to go as they provide the type of detail I am looking to achieve, they cost very little in comparison to the scratch built craftsman kits and have a smaller impact on the environment.
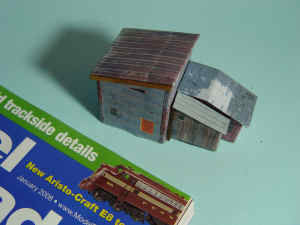 For example, here’s a shot of Karl’s Worm Shack that will occupy a small wharf at the front of the layout. It has a 3” by 1.5” footprint and cost me about 3 cents worth of ink, a sheet of paper and a couple hours of “paperwork”.
Considering I have about 30 more structures ahead of me, this is the only way to go.Afterall, I just turned 69 and I don’t know how many years it would take to stick build these buildings.
Produce Your Own Award Winning Diorama
If you put all your effort into perfecting a smile for the judges, you probably won't see too many blue ribbons on your diorama at local modeling contests.But a properly executed plan can do wonders when it comes to producing an award winner.
Here's a Blueprint for your success:
1. Pick your locale with care. Make it an area you enjoy, know something about or are willing to research. Suit your own tastes in scenery and military or civilian operations.2. Now that you have learned all you can, limit the scope of your scene to be sure it fits within the ream of operational possibility.
3. Just like model railroading, the best plans fit the space available. Know the size of the display you intend to build and then plan the scene to fit the space. Now pick a scale that fits.
4. Detail, detail, detail. Dioramas are still life so details take the place of movement in attracting the eye. Visitors and judges are impressed with detail. Plan your details from the beginning.
5. Jam as much detail into a small scene as possible. If you feature a jeep or other open vehicle don’t forget gauges and knobs
6. Try to build in a portion of a river or a pond, even a beach that gives the viewer a sense of coming into the scene.
7. Design your diorama to include a frame, which controls the audience sight line and provides space to hide lighting gear. Many lighting techniques can be employed to focus patterns, colors and even moving effects in small spaces.
8. Consider using a turntable or a track, roadway or tank treads to provide alternate paths for your modeling subject. You can disguise these with vegetation.
9. Try audio to employ more of your audience’s senses. A speaker located beneath the layout can reproduce the sounds of your scene.
10. Add a “2nd story”. Plan to build your diorama in a “Shoebox” and provide a second level—upstairs snipers even a battle scene at ground level and a plane crash on the top level.
Once More Into The Breach
This month I am beginning a scale modeling ebook about card stock building construction. This will be based on my experiences in scratch building background building flats. It has naturally carried over into an economical alternative to the typical craftsman kit.There are many things I learned in developing this process that make me realize this is a technique long overlooked by the scratch building community.
- Why build railroad layout buildings from paper?
- Using your computer and printer to design and produce buildings you want.
- Why paper models are better for the environment.
- Working with Foamcore boards
- Make them stick, what adhesives to use.
These are just a few of the topics I intend to cover in providing a modus operandi for railroad modelers and dioramists (I know, it isn’t a word) who scratch build structures or portions of structures on a regular basis.
As we roll into an uncertain economy, many of us are looking for ways we can cut costs without sacrificing the excellence of our work.
This new Adobe Acrobat book will join my “Model Masters Tips Log” (there is a link on the
home page and “Practice Today, BYOB” , my diatribe on making modeling practice a regular part of your hobby.
Incidentally, I stumbled onto a rare glimpse into railroad modeling humor coming from the Brits, it is
“Organic Grass, the Cat Owners’ Revenge”
This is only five photos, but I guarantee it will make your day more enjoyable.
Filling The Modeling Prescription
I am impressed with the number of times I find a medical solution to modeling headaches and manage to get double value out of health maintenance equipment.
I have never liked the way the blade on my hobby knife comes loose in the middle of cutting operations like using extra pressure to cut through styrene or thick wood.
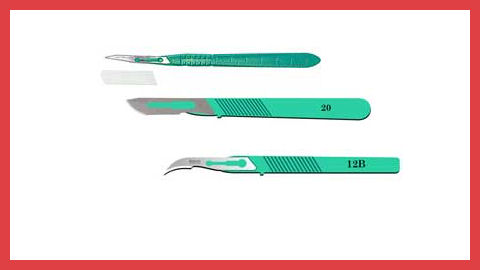
Enter the disposable scalpels, either #11 or #20 blades molded into a plastic handle. At $1.50 apiece they are more expensive than hobby knife blades but the scalpel blades are sharper, made from tempered stainless steel and come individually wrapped. When they start to get dull, just throw them away and grab another. There is no trying to slip a blade into a slot holding the cutting edge.
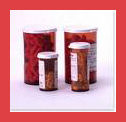 Don’t throw away another pill bottle. Those orange translucent screw-top jugs have multiple uses on your hobby bench. I like them for handling liquid weathering mixes like vinegar and steel wool, or commercial weathering liquid.
They are also handy for storing small detail parts that otherwise rush to the corners of junk drawers. Need a place for screws, nuts and nails? Paint them silver, slap on a Texaco decal and you have an oil tank for your layout.
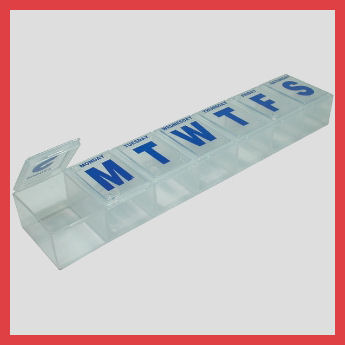
While we are talking about pill containers. See if you can snag one of those seven-pocket, pill boxes like the one I used to organize a week’s worth of pills. I use it now to contain multiple colors of weathering chalk.
When you get to the point of sculpting mountains for a layout or diorama, plaster is normally the “go to” solution.
Why not go a step further and get your hands on plaster bandages used for making leg and arm casts.
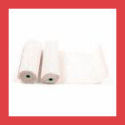
Depending on the size of your landscape, you will need 2 or more fast setting (5-8 minutes) plaster bandages you can find at a large pharmacy.
You can also order a similar material in 10' rolls from Woodland Scenics, but be careful when you work with sheets-sized sections, this material has a habit of clinging to itself like cling wrap.
But in the final analysis it is It is a lot less messy and plaster impregnated bandages provide:
- Intimate Moldability - Molds to every contour for a precise fit
- Low Plaster Loss - Very low wet or dry plaster loss for a creamy mold
- Quick Set Times - Features improved plaster formula for consistency
- High Green Strength - Less chance of breakdown or cast distortion during critical curing phase
- Low Exotherm - “Original Formula” plaster bandages maintains a safe, comfortable cast temperature
- Set Time - Extra Fast: 2-4 minutes, Fast: 5-8 minutes
Finish Your Flight Safely
The controls on the radio are much like the controls in a full-sized helicopter, and as such, they are fairly complex.Loose screws mean parts that fly off when you try to fly! Be wary of loose items like blades. Look for loose screws and nuts or broken pieces.
After each flight, no matter how brief, Look over your copter to make sure there is no physical damage such as broken parts, cracks in the body, or tires that may have come unglued that you may need to repair.
Inspect your radio's operation, make sure all the servos are functioning properly, do a radio check, make sure your frequency is clear, make sure all of your linkages are in place, and check your battery voltage.